First up was the challenge to scrap an addiction. Well, I have several addictions, but since I'd already scrapped layouts about Diet Coke and computers, I decided to switch over to a TV show addiction: Grey's Anatomy. My favorite show. I never miss it, and I have a season pass on iTunes. Here is the layout I came up with:

To read the journaling on this layout, visit my gallery at scrapbook.com using the button on the right.
Another challenge was to use brads. Well I have quite the stash of brads. I have brads in almost every color, Doodlebug's sugar-coated brads, Making Memories' gemstone brads, brads from Basic Grey to coordinate with their Two Scoops line. I pulled out the Two Scoops paper pack and coordinating buttons and brads for this next layout.
 This one is a picture of Lizzie with one of her little cousins. Such a girly, feminine page called for bling. Lots of it! For the "Cousins" title, I mixed glitter in with the paint, and painted the letters. After the paint dried, I sealed it with a glitter glaze, for added sparkle. I did the same thing for the "E" and "L," and for the "&," I just used the glitter glaze by itself. I also Stickled the butterfly and the scallop; and cut the butterfly itself and the scroll out of Bazzill Bling.
For a third challenge, I was to tackle embossing. Wet or dry, just embossing. I don't have the supplies here for wet-embossing, but I do have a Cuttlebug and embossing folders, so I went to town! I decided to create a tag for one of Lizzie's pages, and here is what I came up with:
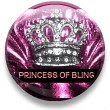
 I used my Cuttlebug to cut a tag out of Grungeboard. I then put it in the swirls embossing folder, and ran it back through the Cuttlebug to emboss it. I treated the tag the same way I did the title on the "Cousins" layout, adding glitter to the paint, and sealing the painted tag with glitter glaze. I stamped the princess image on watercolor paper with StazOn ink, and colored it in with watercolor pencils. Next I got a brilliant idea. I had been undecided as to how to handle the "e" monogram, so I thought I'd be smart and use the watercolor pencils on the chipboard. Once I added the water, though, the chipboard peeled in half, leaving me with two "e's." Oops. A blingy ribbon tied in a bow completed the tag.
There was a fourth challenge, for staples, but unfortunately I am unable to upload the picture. I will keep trying. Happy scrapping!